Neki potrošači pribjegavaju kupnji novih bubnjeva jedinica svaki put kad se suoče s tiskarskim udarcem. Na kraju gube sredstva u procesu. U praksi, Nekoliko problema s bubnjem može se riješiti temeljitim čišćenjem.
Ovaj vodič vodi vas kroz korak po korak vodič za približavanje vježbi čišćenja.
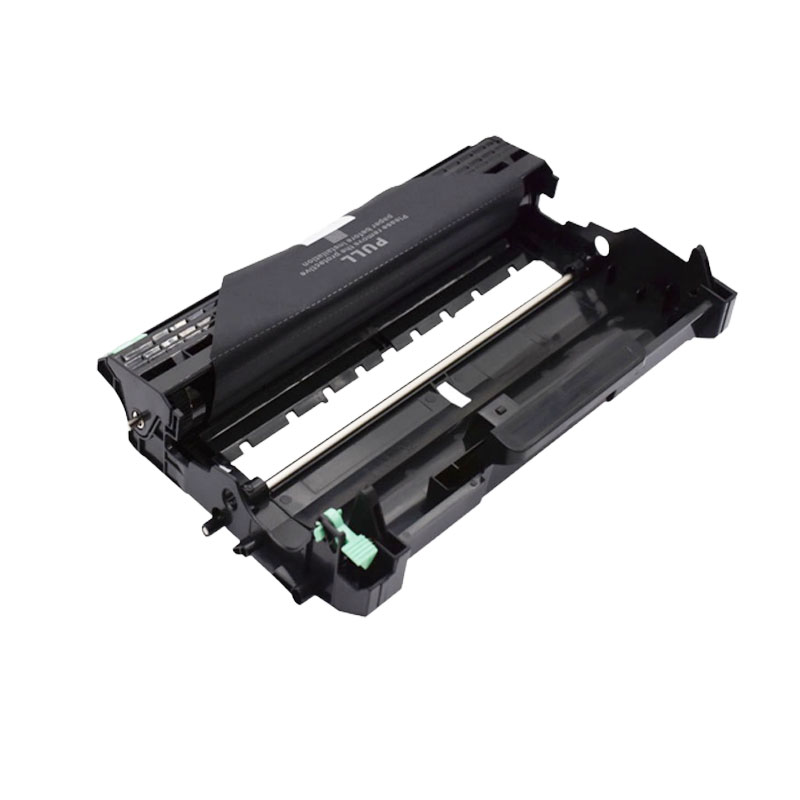
Kako se jedinica bubnja za pisač zaprlja?
Bubnjeve jedinice igraju glavnu ulogu u privlačenju tonera i premještanju na papir. Neće svi toner sletjeti na papir u procesu. Tijekom vremena, Čestice tonera akumulirat će se u jedinici bubnja i na kraju uzrokovati pustoš. Neki će toner čak spustiti u valjke jedinice bubnja. To bi u konačnici utjecalo na njegovu produktivnost.
;Kada je vrijeme za čišćenje jedinice za bubanj?
Recimo da ste nedavno kupili jedinicu bubnja. Koristili ste ga s jednim ili dva kruga toner uloška. Kad pošaljete posao ispisa, Izlazi prljavo i mutno. Drugi dolaze s frustrirajućim vodoravnim linijama. Pobliži pogled otkrit će neke crne mrlje na ispisanim slikama. ;
To je klasičan slučaj problema s jedinicom bubnja. To je kandidat za čišćenje. Nema smisla trošiti dodatne dolara kada se jedinica bubnja može popraviti u jednostavnom postupku. Slijedite sljedeće korake kako biste vratili izgubljenu slavu vaše jedinice bubnja.
Što vam treba za uspješnu vježbu čišćenja
Evo popisa zaliha koji će vam trebati za čišćenje:
- Lateks rukavice ;- Da biste zaštitili ruke od tonera.
- Zaštitna maska ;- radi zaštite od udisanja tonera. Toner bi mogao brzo biti u zraku na najmanjim poremećajima.
- Aktivirana tonerska krpa ;- Ovo je posebna krpa koja zarobljava čestice tonera. To je namijenjeno jednokratnoj upotrebi, I odložit ćete ga nakon vježbe čišćenja. Ako ne možete pronaći toner krpu, krpa bez lint je drugi najbolji materijal.
- 99% čisti izopropilni alkohol ;- Ova tekućina ne ostavlja ostatke. Pisači su osjetljivi na vlagu, I trebate nešto što brže isparava. Ovaj neće nigdje ostati nakon što završite s vježbom čišćenja.
- Četkica za boju ;- kako bismo vam pomogli da udarite toner prah koji se zalijepi na površine pisača. Trebate jedan s mekim čekinjama.
- Pamučna kugla ;- redovne zamjene pamuka mogu obaviti posao.
- Odvijač ;- Trebat će vam da odvrnite orahe. Možda vam neće trebati, Ovisno o vašem modelu pisača.
- Neki stari novine ;također će pomoći da toneč ne oboji vaše površine. Morat ćete ih raširiti u radnom području.
Korak po korak postupak čišćenja bubnjeve jedinice
Slijedite sljedeće korake za čišćenje jedinice bubnja i vraćanje kvalitete svojih otisaka.
Korak 1: Preparation Stage ;
- Pritisnite gumb za uključivanje da biste isključili uređaj. Također je bolje da ga odvojite od izvora napajanja.
- Odvojite kablove koji ih povezuju s računalom.
- Ostavite svoj pisač da se ohladi oko 15 minuta. Laserski pisači postaju pretjerano vrući tijekom tiskanja. Riskirate da održavate opekline ako otvorite unutarnje odjeljke odmah nakon posla za ispis.
- Stavite neke novine na ravnu površinu. Ovdje ćete staviti dijelove poput matica i vijaka kada započnete postupak. Korištenje novina spriječit će mrlje od tonera.
- Stavite masku za lice i rukavice kako biste spriječili izlaganje toner prahu.
- Ostavite otvorene prozore za poboljšanje ventilacije i protoka zraka. To će omogućiti da toner prah pobjegne u slučaju slučajnog izlijevanja.
Korak 2: Remove the Drum Unit ;
- Otvorite futrolu i lagano uklonite uložak i ostavite da se odmori na površini sa starim novinama.
- Ispitajte unutarnje odjeljke kako biste provjerili kako možete ukloniti bubanj.
- Uvijte i uklonite ako ga upravljaju neki mehanizmi za zaključavanje.
- Neki su zaključani valjcima, I trebat će vam odvijač ravne glave. Odvijte valjke i lagano ih uklonite. Potražite korisnički priručnik ako ne razumijete postupak uklanjanja jedinice bubnja. Priručnike možete pronaći na web mjestu pisača.
- Lagano podignite jedinicu bubnja i osigurajte da ne pogodi nikakve tvrde rubove pisača. Položite ga na površinu i pokriti je prikladno. Bubanj je osjetljiv na svjetlost.
Korak 3: Clean the Drum Unit ;
- Nabavite tonersku krpu i povucite se kao da je želite istegnuti. Trpka tonera opremljena je mikrovlakama koje privlače toner u prahu. Izvlačenje će ga aktivirati ove posebne značajke. Možete pribjeći krpi za čišćenje ako ne možete pronaći tonersku krpu. Općenito, toner tkanina je uvijek najbolja opcija.
- Upotrijebite ga za brisanje labavog tonera na vanjskom dijelu jedinice bubnja. ;
- Nabavite pamučnu kuglu i navlažite je 99% izopropil alkohola. Upotrijebite vlažnu kuglu za čišćenje tonera koji se zabijaju na bubnju. Pristupite procesu pažljivo i budite nježni.
- Pristupite valjcima pisača i nježno očistite tonerskom krpom. Možete koristiti i krpu bez kapka.
Korak 4: Očistite koronu žicu
- Otvaranje unutrašnjosti bubnja za pristup koroninoj žici složeno je mučenje. Možete ga otvoriti samo ako imate potrebnu stručnost. Inače, Nije potrebno otvoriti ga jer je jedinica bubnja opremljena mehanizmom za čišćenje.
- Pomaknite zelenu karticu naprijed -nazad nekoliko puta. Taj čistač Corona pomoći će očistiti i očistiti toner za lijepljenje.
- Provjerite koronu rešetku i provjerite da nema krhotina tonera. ;
- Osigurajte da zadržavate karticu za čišćenje na startnom položaju.
Evo video vodiča o tome kako očistiti koronu žicu. Referenca je na brat višenamjenskom pisaču. Princip je isti za sve laserske pisače.
Korak 5: Očistite unutrašnjost pisača
- Pristupite utor za pisač i očistite ga. Usredotočite se na uglove i pukotine i čistite pomoću četkice za boje. Osigurajte da koristite četkicu s mekim čekinjama kako biste izbjegli naštetu dijelovima pisača.
- Obrišite površine pomoću tonerske krpe kako biste apsorbirali sve čestice u prahu. Produžite čišćenje na zidove i pod.
Korak 6: Završetak vježbe čišćenja
- Jednom kad je sve čisto, Morat ćete ponovno umetnuti dijelove natrag u pisač.
- Nježno gurnite jedinicu bubnja u utor.
- Vratite valjke ako ste ih uklonili.
- Pristupite uloškom tonera, i obrišite je tonerskom krpom da apsorbira neki toner na površini. Završite čišćenje i ponovno ga umetnite u pisač.
- Zatvorite futrolu za pisač i sva otvorena vrata.
- Nježno preklopite novine koje sadrže toner i stavljaju ih u kantu za smeće. Zapečatite kako bi se spriječilo curenje tonera.
- Uklonite maske i rukavice, A ti si dobro ići! Sada možete ponovo koristiti svoj pisač.
Zaključak
To su šest praktičnih koraka za čišćenje bubnja i corona žice. To je lak postupak koji ne treba kvalificiranog tehničara. Čak možete završiti cijelu vježbu u roku od jednog sata.
Tražite li zalihe pisača?
Jeste li probali očistiti jedinicu bubnja, Ali kvaliteta ispisa se ne poboljšava? Dobro, postoji šansa da je iscrpio svoj koristan vijek.
Nema puno problema jer ne morate kupiti novi pisač. Brzo možete dobiti zamjenu i zadržati taj posao s ispisa. Imamo i kompatibilne patrone tonera za sve glavne marke.
Mi smo gumb daleko. Možete naručiti na mreži, i organizirat ćemo se za otpremu. Kontaktirajte nas sada.
Jedan odgovor
Bilo mi je prilično drago što sam pronašao ovu stranicu. Želim
Hvala vam na jednom vremenu na ovom fantastičnom čitanju!! Definitivno sam uživao u svakom njegovom dijelu i ja
Jeste li spasili kao omiljenu za viđenje novih stvari na svom blogu.