Unii consumatori recurg la cumpărarea de noi unități de cilindru de fiecare dată când se confruntă cu o problemă de imprimare. Ei ajung să risipească fonduri în acest proces. În practică, mai multe probleme cu tamburul pot fi rezolvate printr-o curățare minuțioasă.
Acest ghid vă prezintă un ghid pas cu pas pentru abordarea exercițiului de curățare.
Cum se murdărește unitatea de cilindru a imprimantei?
Unitățile de cilindru joacă un rol esențial în atragerea tonerului și transferul acestuia pe hârtie. Nu tot tonerul va ajunge pe hârtie în timpul procesului. Peste orar, particulele de toner se vor acumula în unitatea de cilindru și vor ajunge să provoace ravagii. O parte din toner va ajunge chiar și în rolele unității de cilindru. Acest lucru i-ar afecta în cele din urmă productivitatea.
;Când este timpul să vă curățați unitatea de cilindru?
Să presupunem că ați cumpărat recent o unitate de cilindru. L-ați folosit cu una sau două runde de cartuş de toner. Când trimiteți o lucrare de imprimare, iese murdar și neclar. Alții vin cu linii orizontale frustrante. O privire mai atentă va dezvălui câteva puncte negre pe imaginile imprimate. ;
Acesta este un caz clasic de problemă cu unitatea de cilindru. Este un candidat pentru curățare. Nu are rost să cheltuiți dolari în plus atunci când unitatea de cilindru poate fi reparată într-un proces simplu. Urmați următorii pași pentru a restabili gloria pierdută a unității de cilindru.
De ce ai nevoie pentru un exercițiu de curățare de succes
Iată o listă cu consumabilele de care veți avea nevoie pentru curățare:
- Mănuși de latex ;– pentru a vă proteja mâinile de petele de toner.
- Mască ;– pentru protecție împotriva inhalării tonerului. Tonerul ar putea ajunge rapid în aer la cea mai mică perturbare.
- Toner activat ;– aceasta este o cârpă specială care prinde particulele de toner. Este conceput pentru o singură utilizare, și îl vei elimina după exercițiul de curățare. Dacă nu găsiți o cârpă de toner, cârpa fără scame este al doilea cel mai bun material.
- 99% alcool izopropilic pur ;– acest lichid nu lasa reziduuri. Imprimantele sunt sensibile la umiditate, și ai nevoie de ceva care se evaporă mai repede. Acesta nu va rămâne nicăieri odată ce ați terminat cu exercițiul de curățare.
- Pensula ;– pentru a vă ajuta să îndepărtați praful de toner care se lipește pe suprafețele imprimantei. Ai nevoie de unul cu peri moi.
- Minge de bumbac ;– schimburile obișnuite de bumbac pot face treaba.
- Şurubelniţă ;– veți avea nevoie de el pentru a deșuruba piulițele. S-ar putea să nu ai nevoie de el, în funcție de modelul imprimantei dvs.
- Unele vechi ziare ;va ajuta, de asemenea, să împiedice tonerul să vă păteze suprafețele. Va trebui să le răspândiți în zona de lucru.
Proces pas cu pas pentru curățarea unității cilindru
Urmați următorii pași pentru a curăța unitatea de cilindru și a restabili calitatea imprimărilor.
Pasul 1: Preparation Stage ;
- Apăsați butonul de pornire pentru a închide dispozitivul. De asemenea, este mai bine să-l deconectați de la sursa de alimentare.
- Deconectați cablurile care îl leagă de computerul dvs.
- Lăsați imprimanta să se răcească timp de aproximativ 15 minute. Imprimantele laser se încălzesc excesiv în timpul imprimării. Riscați să suferiți arsuri dacă deschideți compartimentele interioare imediat după o lucrare de imprimare.
- Pune niște ziare pe o suprafață plană. Aici veți pune piese precum piulițe și șuruburi când începeți procedura. Utilizarea ziarelor va preveni petele de toner.
- Puneți o mască de față și mănuși pentru a preveni expunerea la pudra de toner.
- Lăsați ferestrele deschise pentru a îmbunătăți ventilația și fluxul de aer. Acest lucru va face posibil ca pulberea de toner să scape în cazul unei vărsări accidentale.
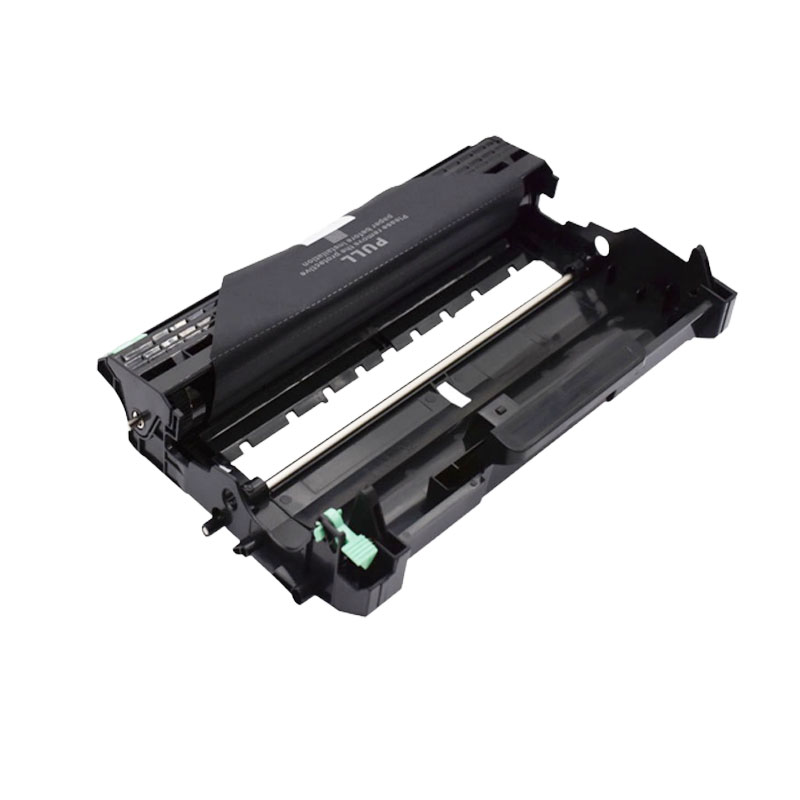
Pasul 2: Remove the Drum Unit ;
- Deschideți carcasa și scoateți ușor cartușul și lăsați-l să se odihnească pe suprafață cu ziare vechi.
- Examinați compartimentele interioare pentru a verifica cum puteți scoate tamburul.
- Răsuciți și îndepărtați-l dacă este gestionat de unele mecanisme de blocare.
- Unele sunt blocate cu role, și veți avea nevoie de o șurubelniță cu cap plat. Deșurubați rolele și scoateți-le ușor. Consultați manualul de utilizare dacă nu înțelegeți procesul de îndepărtare a unității de cilindru. Puteți găsi manualele pe site-ul web al imprimantei.
- Ridicați ușor unitatea de cilindru și asigurați-vă că nu lovește marginile dure ale imprimantei. Așezați-l pe suprafață și acoperiți-l corespunzător. Tamburele sunt sensibile la lumină.
Pasul 3: Clean the Drum Unit ;
- Luați cârpa de toner și trageți ca și cum doriți să o întindeți. Laveta de toner este echipată cu microfibre care atrag pulberea de toner. Desfacerea acestuia va activa aceste caracteristici speciale. Puteți recurge la o cârpă fără scame pentru curățare dacă nu găsiți cârpa de toner. În general, Tonerul este întotdeauna cea mai bună opțiune.
- Folosiți-l pentru a șterge tonerul liber de pe secțiunea exterioară a unității de cilindru. ;
- Luați o minge de vată și umeziți-o cu alcool izopropilic 99%.. Utilizați bila umezită pentru a curăța peticele de toner care se lipesc pe cilindru. Abordați procesul cu grijă și fiți blând.
- Accesați rolele imprimantei și curățați ușor cu o cârpă de toner. De asemenea, puteți utiliza o cârpă fără scame.
Pasul 4: Curățați firul Corona
- Deschiderea interiorului tamburului pentru a accesa firul corona este un calvar complicat. Il poti deschide doar daca ai expertiza necesara. Altfel, nu este necesar să-l deschideți deoarece unitatea de cilindru este echipată cu un mecanism de curățare.
- Glisați fila verde înainte și înapoi de câteva ori. Acel agent de curățare corona va ajuta la curățarea și eliminarea tonerului care se lipește.
- Verificați grila corona și asigurați-vă că nu există resturi de toner. ;
- Asigurați-vă că păstrați urechea de curățare în poziția de pornire.
Iată un ghid video despre cum să curățați firul corona. Referința este pe imprimanta multifuncțională Brother. Principiul este același pentru toate imprimantele laser.
Pasul 5: Curățați interiorul imprimantei
- Accesați slotul unității de cilindru al imprimantei și curățați-l. Concentrați-vă pe colțuri și crăpături și curățați cu o pensulă. Asigurați-vă că utilizați o perie cu peri moi pentru a evita deteriorarea pieselor imprimantei.
- Ștergeți suprafețele folosind cârpa de toner pentru a absorbi toate particulele de pulbere de toner. Extindeți curățarea la pereți și podea.
Pasul 6: Finalizarea exercițiului de curățare
- Odată ce totul este curat, va trebui să reintroduceți piesele înapoi în imprimantă.
- Împingeți ușor unitatea de cilindru înapoi în fantă.
- Returnați rolele dacă le-ați îndepărtat.
- Accesați cartușul de toner, și ștergeți-l cu o cârpă de toner pentru a absorbi puțin toner la suprafață. Terminați curățarea și reintroduceți-o înapoi în imprimantă.
- Închideți carcasa imprimantei și toate ușile deschise.
- Îndoiți ușor ziarele care conțin toner și puneți-le la coșul de gunoi. Sigilați-l pentru a preveni scurgerile de toner.
- Scoateți măștile și mănușile, Și ești bine să pleci! Acum puteți utiliza din nou imprimanta.
Concluzie
Aceștia sunt cei șase pași practici pentru curățarea unității cilindru și Corona Wire. Este un proces ușor care nu necesită un tehnician calificat. Puteți chiar să terminați întregul exercițiu în decurs de o oră.
Căutați consumabile pentru imprimantă?
Ați încercat să curățați unitatea de cilindru, dar calitatea imprimării nu se îmbunătățește? Bine, există șansa ca acesta să-și fi epuizat durata de viață utilă.
Nu sunt prea multe probleme, deoarece nu trebuie să cumpărați o imprimantă nouă. Puteți obține rapid un înlocuitor și puteți menține acea lucrare de imprimare în funcțiune. Avem și cartușe de toner compatibile pentru toate mărcile importante.
Suntem la un buton distanță. Puteți plasa o comandă online, Și ne vom organiza pentru transport. Contactaţi-ne acum.
Un singur răspuns
Am fost destul de încântat să găsesc această pagină. vreau să
multumesc pentru timpul acordat doar pentru aceasta lectura fantastica!! Cu siguranță mi-a plăcut fiecare parte din ea și eu
De asemenea, ați salvat ca preferat pentru a vedea lucruri noi pe blogul dvs.